|
13.2 Adding
Artificial Clouds
While it’s usually preferable to
keep the backgrounds of your images relatively simple and
non-distracting, for photos having a clear sky in the background you’ll
sometimes wish there were some light clouds to break up the
monotony. While you could use the methods from the previous
section to replace the background with a photo of a more interesting
sky, sometimes it’s simpler to let Photoshop render some artifical
clouds for you. The Filter
> Render > Clouds filter often
works fairly well, as long as you take some precautions to reduce the
artificial appearance of the result.
The first thing you need to know is that you don’t
want to actually render the clouds directly onto your background
layer. Instead, you want to render the cloud pattern into a layer
mask. The trick is to create two background layers, one adjusted
so as to increase darkness and the other adjusted to increase
brightness, and then to render a cloud pattern into the layer mask of
one of those layers, to achieve a blending between the lighter and
darker background layers. This is illustrated below.
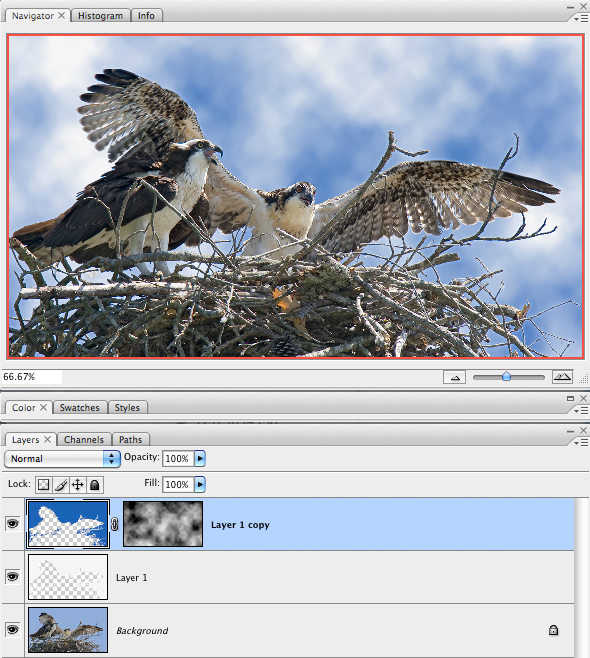
Fig. 13.2.1: Adding artificial clouds in Photoshop is fairly simple,
using layer masks. Just create two background layers, render
clouds in the higher layer’s mask (Filter > Render > Clouds),
and then adjust the brightness of the two layers, to make one
lighter and one darker. The lighter layer shows through as
clouds. You may need to increase the contrast of the layer
mask, to make the clouds more distinct.
In the figure above, you can see that we have three
layers. The bottom layer is the original image. We used the
Select > Color Range
menu option to select the blue sky in this
image and then pressed Cmd-J / Ctrl-J
to copy that selection to a new
layer. We then pressed Cmd-J /
Ctrl-J a second time, to duplicate
the new layer. We then used Levels
to increase the brightness of
the lower background layer (the middle layer in the stack) and again to
darken the upper background layer (the top layer of the stack).
Finally, we added a layer mask to the top layer and invoked Filter >
Render > Clouds to create a grayscale cloud pattern in the
layer
mask. This allows parts of the lower, brighter layer to show
through the upper layer, creating the illusion of clouds.
Note that you can wait to change the brightness of
the layers until after you’ve created the layer mask; this will allow
you to make your adjustments to the two layers while getting immediate
visual feedback. Adjusting the relative brightness of the two
layers will determine both how bright the clouds are and how blue the
sky is. Note that your clouds may appear bluish, and this is
often
OK: thin clouds can in reality allow some of the sky’s blue color to
show through. If your clouds look too blue for your tastes, you
can either continue to increase their brightness (to bleach out the
color) or apply Hue/Saturation
to reduce saturation of the lower
background layer. Likewise, if you find that you need to darken
the sky considerably to create enough contrast between the sky and the
clouds, but that this results in an unattractive color for the sky, you
can use Hue/Saturation to
correct the color of the upper layer.
One trick you can use to improve contrast between
the sky and the clouds is to apply a contrast filter to the layer
mask. I typically opt to do this using Levels, since it gives me
more control than the Brightness/Contrast
tool. You can also
apply a Gaussian Blur to the
layer mask to make the clouds look
smoother. The image below shows a poor example of artificially
rendered clouds. These clouds look bad for a number of reasons,
including over-brightness in some areas, excessive contrast, and an
overall rectilinear patterning that appears obviously
computer-generated.
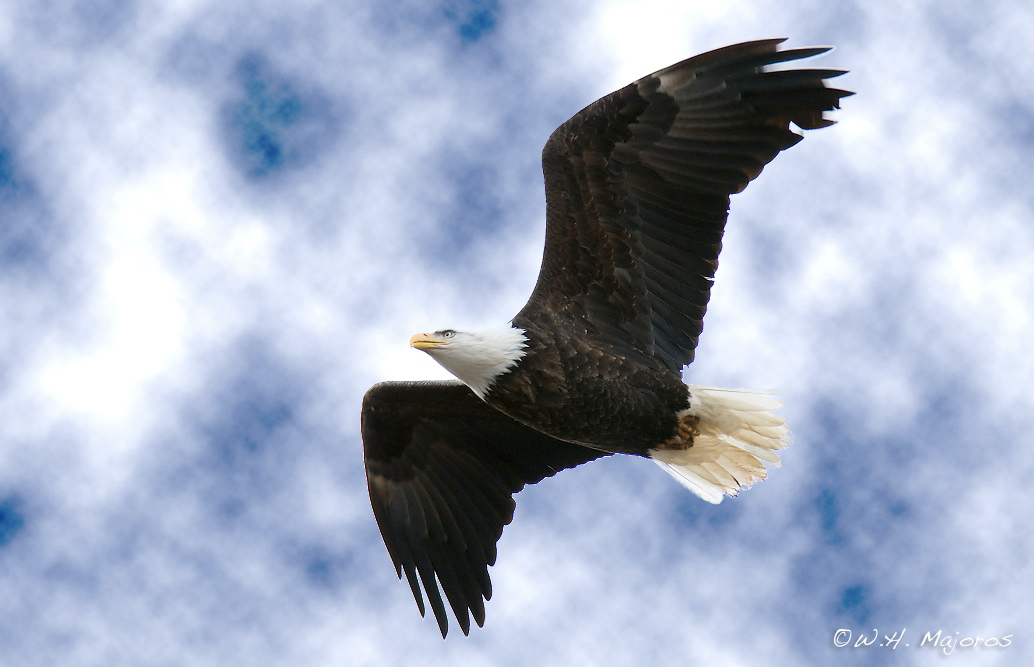
Fig. 13.2.2: A
poor job of rendering clouds. The background of this image
has three obvious problems: some highlights are blown in the clouds, the
cloud pattern is too contrasty, and the entire pattern appears computer-
generated. The latter two problems can be mitigated by applying a
Gaussian Blur to the layer mask (not to the layer’s image pixels!).
The excessive contrast and
rectilinearity can be fixed by applying a Gaussian Blur to the layer
mask. As you can see in the figure below, clouds rendered in high
resolution in Photoshop can indeed be made to look quite smooth using
an appropriate blur radius in the Gaussian
Blur.
Another thing to notice in the figure below is the
existence of some edge effects resulting from an imperfect selection
when creating the background layers. The edges in this image have
actually been touched-up using the Clone
tool, and yet you can still
see a bit of a halo around the bird’s beak, and to a lesser extent
along the edge of the wing. Similar methods to
those described in the previous section can be applied to address these
edge artifacts. (Note that the dark shadow above the bird’s head
is likely the result of either flash or the use of a sharpening
filter).
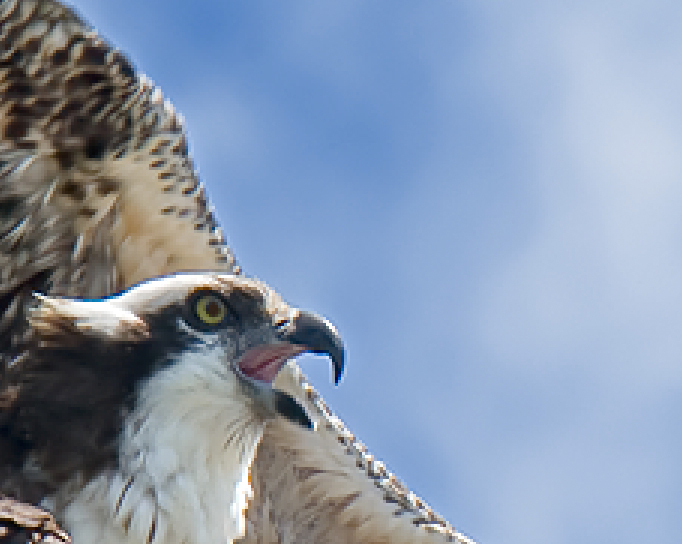 Fig.
13.2.3: Gaussian Blur applied to the image mask can indeed create
Fig.
13.2.3: Gaussian Blur applied to the image mask can indeed create
very smooth-looking clouds. Note that some edge effects remain
(around
the bird’s beak), though the Clone tool was applied to remove most of
the edge artifacts.
Note that you can use multiple cloud layers.
This allows you increase the realism of the clouds by introducing
additional variability. Simply create additional copies of the
top background layer, render clouds in the layer mask of each, and then
adjust the brightness of each layer’s image pixels until you like what
you see. You’ll probably want to reduce the density of the cloud
patterns in the higher layers by applying the Levels tool to adjust the
brightness of the layer masks; otherwise, you may end up biasing the
cumulative masking effect so that the lower layers don’t show through
much at all. The figure below illustrates a variant of this
approach: in this case, four background layers were used—one upper
layer with a cloud mask, and three lower layers, each of a different
color (white, gray, blue). The gray and blue layers were trimmed
using a soft-edged eraser so as to show up only in diagonal bands
across the image.
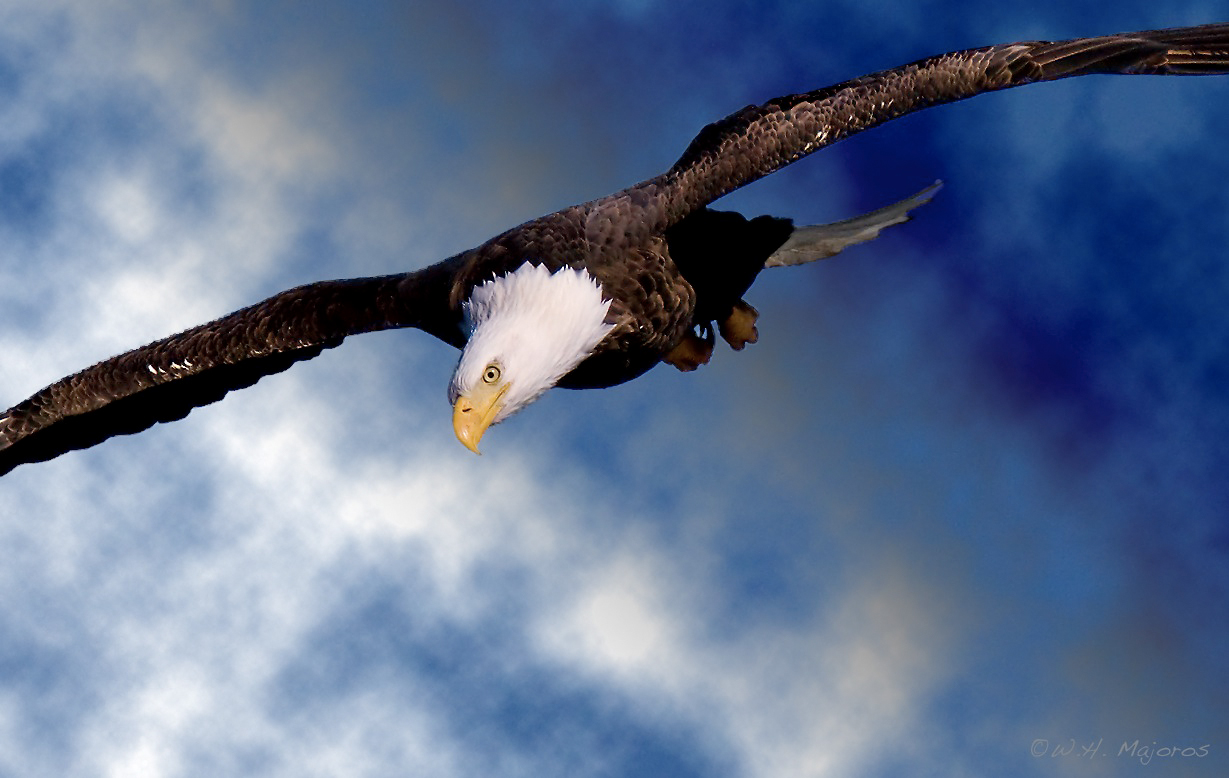
Fig. 13.2.4:
Don’t be afraid to get creative. This image’s background
was rendered using four layers: three colored under-layers and one
upper layer with a cloud mask. This is a rather extreme example;
applying this technique with more subtlety can result in some
very convincing (albeit computer-generated) backgrounds.
Note that the methods described
here for rendering clouds in the sky can be used in other situations to
add subtle texture to other types of backgrounds (e.g., smooth water,
out-of-focus landforms, etc.). By rendering clouds into a mask
layer and then applying a more subtle brightness adjustment to the
duplicated background layer, you can increase the perception of texture
in the background without imposing a recognizable cloud effect. I
used this method in the two images shown below before rendering them
onto canvas; the added texture, when printed on canvas, suggests a
sponge-brush effect like you might see in a real painting.
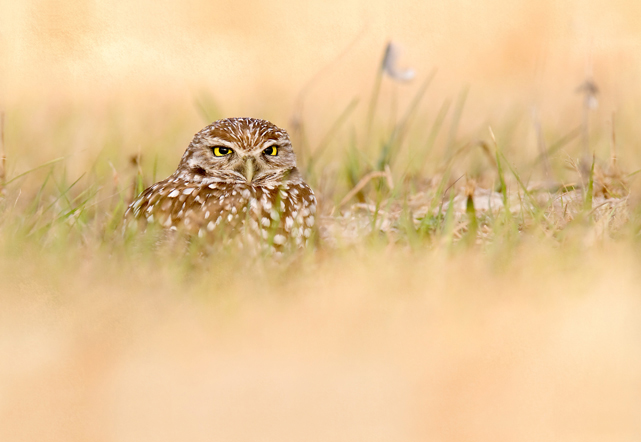
Fig. 13.2.5:
The cloud-rendering technique can be used in places other than skies.
In this example, it was used to add texture to the smooth background,
so that when
the image was rendered on canvas it would appear more like an aged
painting.
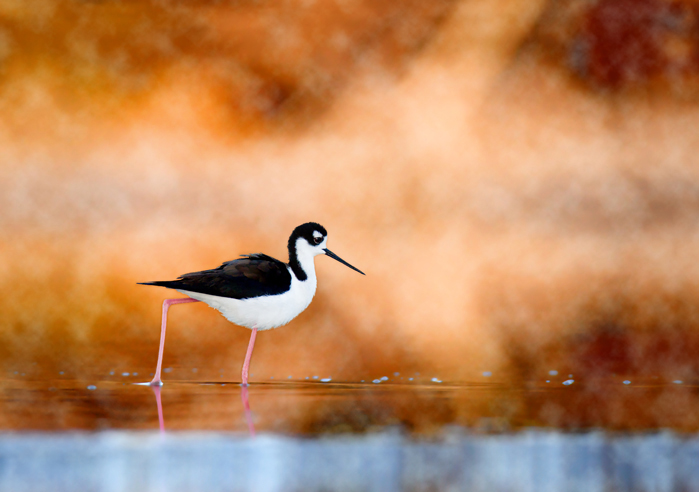
Fig. 13.2.6:
Another example of the use of the cloud-rendering trick
to create texture in non-sky backgrounds. In this example the goal
was again to create a sponge-brush effect when the image is printed
onto canvas. More subtle use of the same techniques can be used
to add texture for images to be rendered on more sensitive media.
|
|
|