|
Chapter
7
Using
Flash
7.1 Why Use
Flash?
In the previous chapter we
considered methods for achieving good exposures—that
is, for getting
images that are not too dark and not too bright. By adjusting the
aperture, shutter speed, and ISO setting, we can control the
amount of
light reaching the camera’s imaging sensor—up to a point. On
overcast days or in deep forest you’ll often find that there’s not as
much light available as you’d like. In order to achieve
reasonable exposures in these situations you’d normally have to
compromize either the noise level (by boosting ISO), the depth-of-field
or lens sharpness (by using an extremely wide aperture), or the ability
of the camera to freeze the bird’s motion (by using a slow shutter
speed). The use of flash—i.e.,
a brief pulse of artificial lighting—can both alleviate lighting
constraints and in some cases provide an extremely effective means of
freezing very fast motion (such as the rapid wingbeats of a
hummingbird).
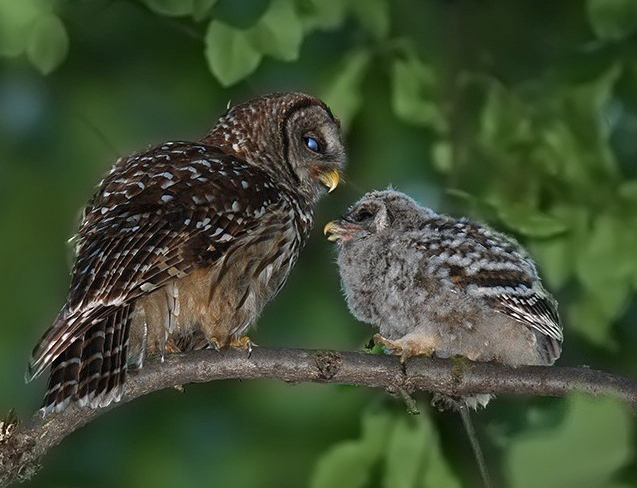
Fig.
7.1.1 :
In deep forest settings, flash is a necessity. This mother owl
and her baby
were lit from below by flash, producing far more detail, and better
color capture,
than could have been done without the flash. Note that the blue
glow in the adult’s
eye is not an artifact of flash: she’s blinking her nictitating
membrane.
(1/80 sec, f/4, ISO 800, TTL flash at -2/3 FEC w/Better Beamer, 600mm)
The above image illustrates the
value of flash in dim environments. In this case I was
photographing a mother owl and her baby beneath a dense forest canopy
on an overcast day. This image simply wouldn’t have been possible
without the use of flash. Even with the use of a wide aperture (f/4), a
slow shutter speed (1/80 sec), and a moderately high ISO setting (ISO
800), a comparable image
couldn’t have been obtained without flash, considering the low noise
level, the sharpness and detail, and the color fidelity of the image
that was captured using flash. While
it’s easy to propose that “natural” lighting should produce the most “natural” color, the real issue (assuming
your purpose in photographing birds is to produce aesthetic images) is
how to
obtain the most pleasing
colors—keeping in mind that our eyes see
more color in direct sunlight than in shady ambient light. Since
flash units are typically calibrated to the same color “temperature” as noon sunlight (around 5700
degrees Kelvin), they provide a far better approximation to white light
than does indirect sunlight, since indirect sunlight (what we call ambient light) carries with it the
color biases that are imposed by the various natural surfaces off of
which that light has reflected (or passed through, in the case of
clouds or water vapor). In short, since flash mimics the
color distribution of pure sunlight, it’s much more suited to bringing
out vibrant colors in bird plumages than the impure ambient light
available in shaded or overcast environments.
Another example of the color advantage of flash is
shown below. This figure shows two different birds, both
warblers, shot on different days with different cameras and
lenses (the bird on the left is a black-throated green warbler, and the
bird on the right is a hooded warbler). But the main contributing
factor to the differences in lighting and
color rendition is the use of flash for the photo on the
left, and the absence of flash in the photo on the right.
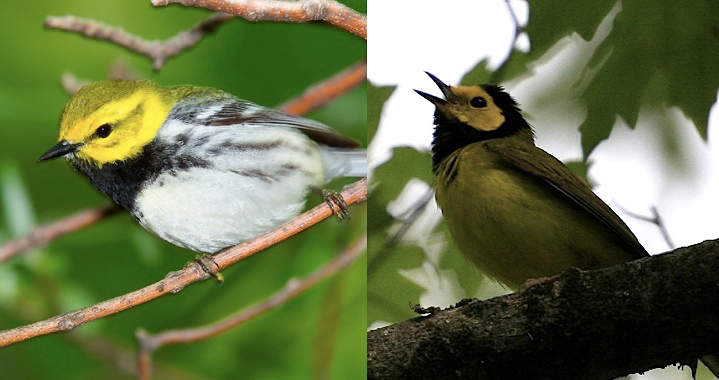
Fig. 7.1.2 :
To flash or not to flash? The flash image (left) shows more
detail and more vibrant
colors than the non-flash image (right). Note the fine detail in
the black throat patch in the bird
on the left, due to flash. Finally, note that both birds have a
catchlight in the eye—the one created
by flash, and the other a reflection from the ambience of the bright,
overcast sky.
Notice in this example that while both birds have yellow and black
heads, the yellow on the flashed bird (left photo) is much richer, and
that even the black plumage shows fine detail in the flash image.
In
contrast, the image on the right shows no detail whatsoever within the
black part of the bird’s plumage. The photo on the right is even
overexposed, with the gray sky appearing almost white instead of gray,
and yet
the bird is still very lacking in detail and color as compared to the
photo taken with flash (left).
As we’ll see in the next section, flash tends in
most cases to affect the luminance of the foreground far, far more than
it does the background. This often has the effect of making the
subject (the bird) stand out more from its background than would occur
without flash, and for bird photography that’s most often a desirable
trait.
Flash even has its uses in bright environments, as
illustrated in the figure below. Here we’re dealing with a bird
that is extremely back-lit,
meaning that the sunlight is striking the far side of the
bird—i.e., the side of the bird that’s facing away from the camera.
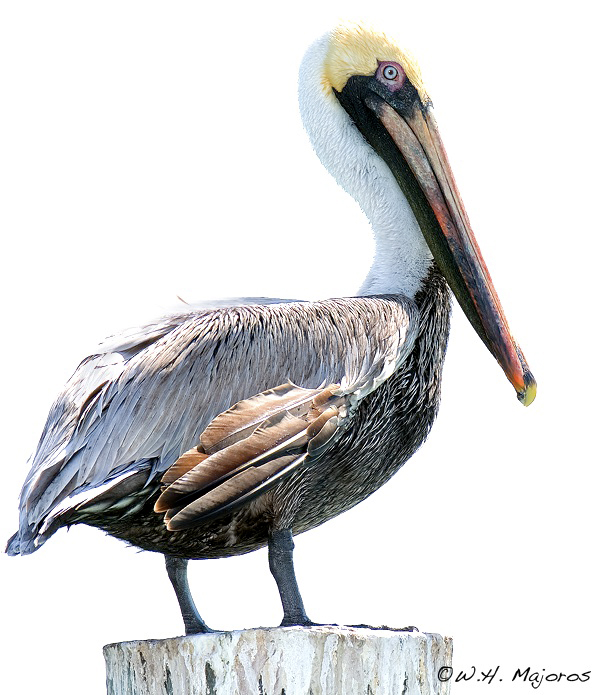
Fig. 7.1.3 :
Flash in backlighting is a godsend. The sunlight was shining on
the far
side of the bird (and on a small portion of the bird’s back).
Full-power flash with a
flash extender allowed details in the underside of the bird to be
brought out far better
than they would via ambient light alone. (1/160 sec, f/6.3, ISO
125, TTL flash at +3 FEC).
In this case I was able to bring out a very considerable amount of
detail in the bird’s right wing and on its chest and belly, which were
not in
direct sunlight. Notice the fine details on the bird’s black
legs, which
were also fully shaded from the sun. This bird was about 40 feet
from my camera, requiring the use of very strong flash lighting to
illuminate its darker features. I accomplished this by turning up
the flash to full power (actually, by turning up the flash exposure compensation—we’ll get to that in section 7.5) and
using a large flash extender;
flash extenders will be
discussed in section 7.9.
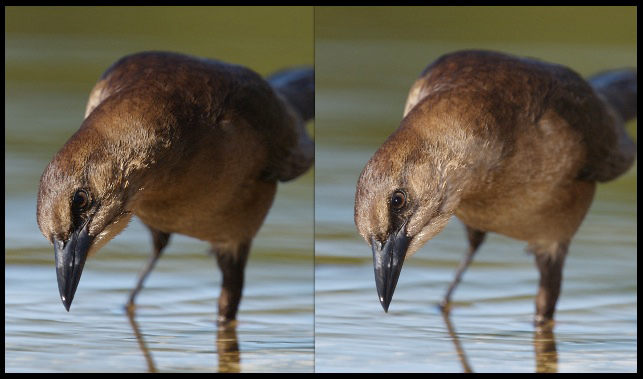
Even subtle uses of flash can be very effective in
improving a photo’s exposure. In the twin images below you
can see that one image has more shadow areas—and less detail—than
the other.
Fig. 7.1.4 :
Fill flash (right) versus no flash (left). The fill flash has
partially dispelled some
of the shadows, particularly around the eye and in the parts of the
bird’s upper plumage facing
away from the sun. Flash has also created a catchlight in the
bird’s eye, though an off-center
catchlight would look better (this can be trivially fixed in
postprocess).
The right image used what’s termed
fill
flash—meaning that flash was used not as the main light source
for the scene, but as a subtle augmentation of lighting to dispel
unwanted shadows. These two photos were taken in rapid succession
using continuous drive mode
(discussed in the previous chapter). For the image on the right,
which was taken first, the flash fired properly, but when the camera
took the image on the left just a fraction of a second later, the flash
failed to fire because its capacitor wasn’t yet sufficiently
re-charged. Notice that the backgrounds are essentially
unaffected by the flash, while many of the shadow areas on the bird
have been illuminated by the flash in the image on the right.
Techniques for effective use of fill flash are discussed in section 7.6.
Although flash can introduce unpleasant image
artifacts in the bird’s eye (so-called steel eye, or red eye in some
species), in some cases it can actually improve the rendering of the
eye by adding a catchlight, as demonstrated by the image below.
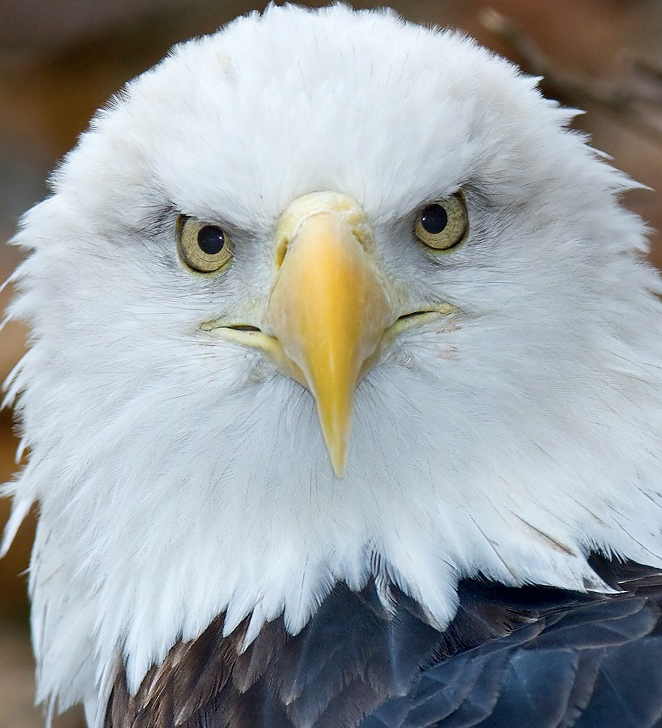
Fig.
7.1.5 :
Another example of a catchlight created by flash. Note also the
enormous
amount of detail in the white feathers (retaining details in pure white
subjects is always a
challenge in photography). Much of this detail is
due to the “micro-contrast” phenomenon
commonly produced by flash, which was explained in section 4.3.
The small, white spots in this
eagle’s pupils are reflections from the flash, and while they may not
perform an especially strong role in this particular image, for other
birds (especially those
with completely black eyes) a catchlight can make the difference
between eyes that appear natural and those that appear “dead”.
Catchlights often occur naturally from direct sunlight, but when the
sun doesn’t cooperate, an artificial catchlight (either from flash or
drawn in later in Photoshop) can significantly improve an image of a
black-eyed bird.
One very significant benefit of flash, especially
when used at
close range on small birds such as warblers and vireos, is the effect
that I call micro-contrast.
This phenomenon was described previously in section 4.3.
Although
it can occur with natural sunlight, it’s more consistent and
controllable when induced via flash. The vireo image below
illustrates micro-contrast quite well.
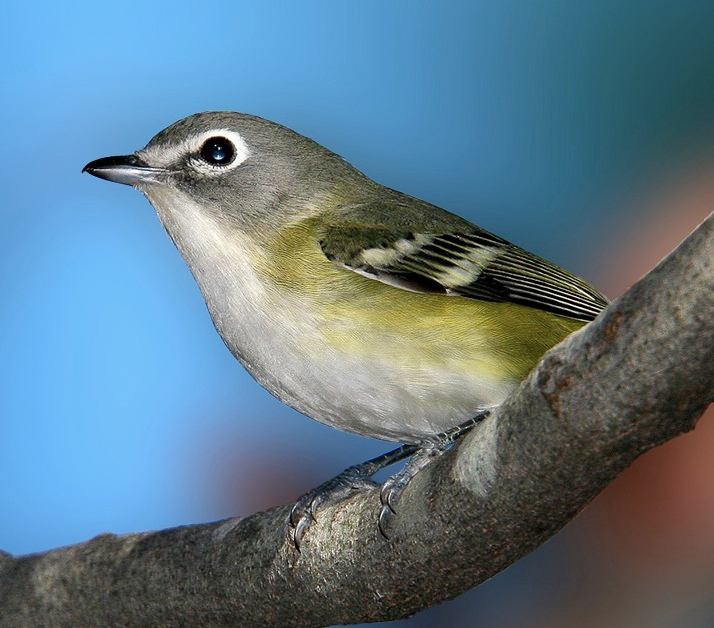
Fig.
7.1.6 :
Another example of micro-contrast. The individual feathers are
visible in almost
all parts of this tiny bird’s plumage, due to the effect of
flash. Although sunlight can also create
micro-contrast, flash tends to do so more reliably and over more of the
visible portions of the bird.
A small amount of steel-eye is visible in the lower half of this bird’s
eye; this can be fixed in postprocess.
(1/1600 sec, f/8, ISO 500, TTL flash at -1 FEC, 800mm)
In the image above,
micro-contrast appears via the minute feather details on the bird’s
cheek, throat, chest, belly, and flank. As explained previously,
micro-contrast emerges when fine feather details are illuminated by
light from a single direction. Individual facets of a feather’s
filaments (the rachis, barbs, and barbules) reflect light in
different directions, depending on their
orientation relative to the camera’s sensor plane. Facets
parallel to the sensor plane reflect back much more strongly than other
microscopic features just thousandths of an inch away, resulting in an
exaggerated degree of contrast between neighboring microscopic features
on the bird, as seen by the imaging sensor.
The kinglet image below gives another example of
microcontrast. Of all the ruby-crowned kinglet photos I’ve seen
posted on the internet, most of them depict the bird as having a
largely uniform beige color. As you can see below, the
bird’s plumage actually has quite a large range of colors. While
the unidirectional nature of flash light enhances the micro-contrast of
the bird’s feather filaments, the use of stronger lighting—and
lighting with a more neutral color
temperature
than that of ambient light—results in more subtly discernible color
gradients than would otherwise occur.
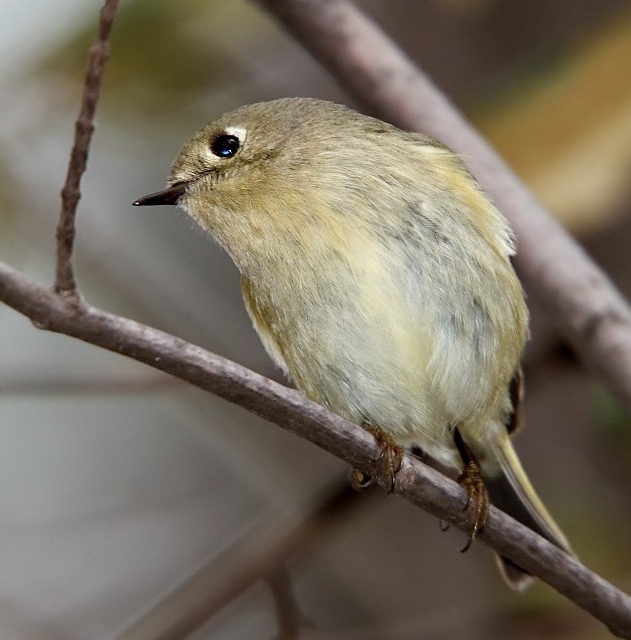
Fig.
7.1.7 : Yet another example of micro-contrast. Capturing this
level of detail in such
a tiny bird (a ruby-crowned kinglet) requires high magnification and
good lighting.
The lower catchlight and small amount of steel-eye can easily be
removed in postprocess.
The upper catchlight is likely from ambient light.
A final
advantage of flash that we’ll consider in this chapter is its
ability—when used properly and in the right conditions—to freeze
fast motion. Many novice photographers don’t realize that the
duration of a single flash pulse can be much, much faster than the
fastest shutter speed on an SLR camera, and that freeze-frame images of
hummingbirds and other fast-flapping birds are typically obtained using
flash to freeze
the bird rather than a fast shutter-speed.
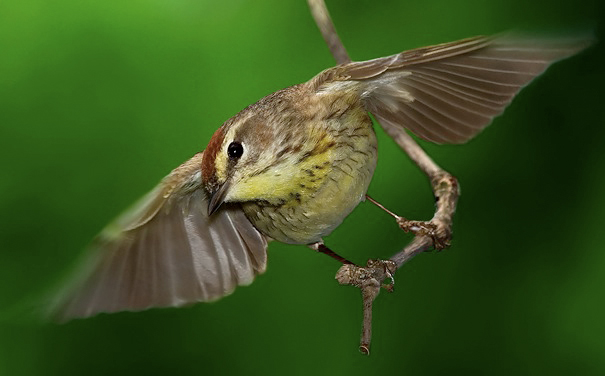
Fig. 7.1.8 :
Freezing a bird’s wings via flash. Although there’s still a lot
of motion blur
in this bird’s wings, without the flash it’s doubtful the wings could
have been frozen as
well as they were. This shot was not planned: if
you take enough photos of warblers
you’re likely to get a few with the wings spread like
this, by sheer luck. Note that the
background of this image was replaced via Photoshop.
In this chapter we’ll consider all of these advantages of flash
photography, and we’ll show in detail how they can be used to improve
your ability to capture stunning images of wild birds.
|
|
|