|
13.4 Simulating
Motion Blur
Although motion blur is typically
undesirable in bird photography, it can sometimes enhance rather than
mar an image, especially if it affects only part of the scene, such as
a hummingbird’s wings. For birds in flight, if the background is
too busy for your tastes, you might consider adding some motion blur to
the background to strengthen the perception that the bird is
moving. This is the application that we’ll consider in this
section.
The figure below shows a male osprey hurrying back
to to the nest with a meal for the family. To reinforce the
impression of urgency and great speed, we’ll apply the Motion Blur
filter in Photoshop to the background; the impression we’re trying to
create is that while the viewer maintains focus on the bird, the scene
is passing by in a blur.
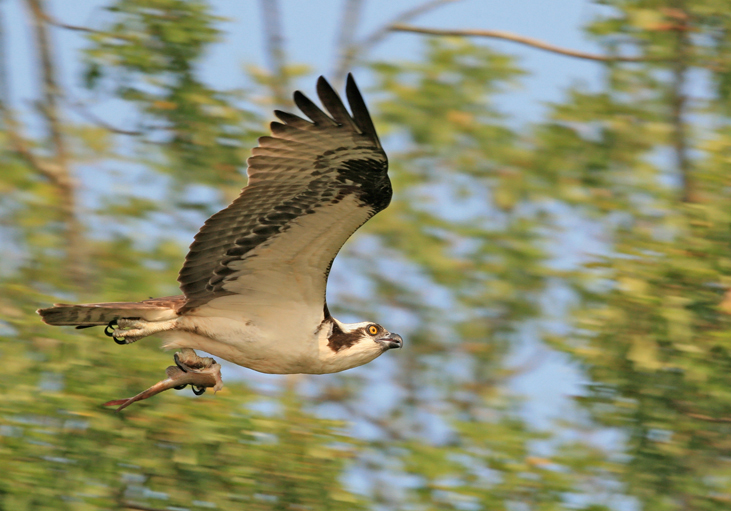
Fig.
13.4.1: Male osprey on his way back to the nest with yummy
victuals. Because the
camera was following the bird, the background was in motion, and is
thus slightly blurred.
The Filter > Blur > Motion Blur effect in Photoshop can be used
to exaggerate this effect.
As usual, the first step is to separate the bird
from the background, via the use of layers. In this case we used
the Quick Selection tool to
quickly select the bird, and then used Select
> Inverse to invert the selection so as to include the
background instead
of the bird. Pressing Cmd-J /
Ctrl-J then copies the background
into a new layer. (We could instead have duplicated the entire
image and then used the background selection to initialize a layer
mask). The resulting Layers
panel is shown below. Note that
we’ve locked the transparent pixels in the top layer by clicking on the
checkerboard icon next to the “Lock” label.
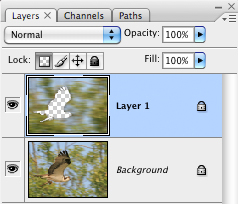 Fig.
13.4.2: The Layers panel after
Fig.
13.4.2: The Layers panel after
creating a background layer. The bird
has clearly been omitted from the
background layer. We could also have
left the bird in the background layer
and then masked it out using a layer
mask.
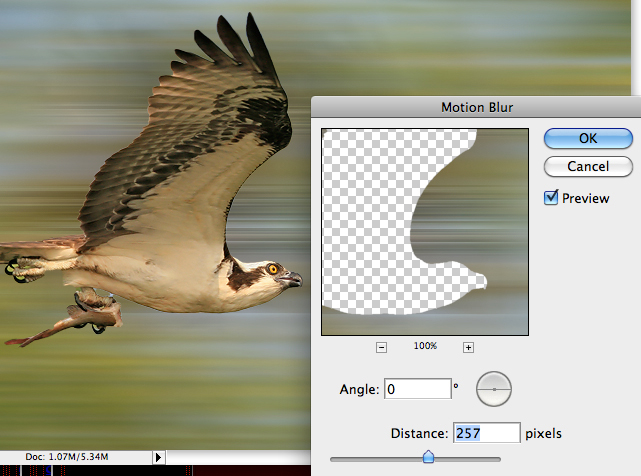
We then invoke the Filter
> Blur > Motion Blur
filter while the background layer is active (the blue highlighting in
the above figure indicates which layer is active). The figure
below depicts the Motion Blur
tool. Then Angle
setting was left
at 0 since the bird is flying horizontally. The trick is then to
find a Distance value that
conveys the desired sense of speed.
With the Preview box checked,
changes to this slider should appear
instantaneously on your screen so you can judge the aesthetics of the
effect.
Fig.
13.4.3: The Motion Blur tool in Photoshop allows you
to indicate an angle and degree of blurring (“Distance”).
While the angle obviously needs to match the direction of
movement, the Distance setting allows some flexibility in
achieving the desired artistic effect.
The figure below shows the final image, after
application of the blur filter. Note several things about this
image. First, the blurring of the background not only conveys the
notion of movement and speed, but also reduces the detail in the
background and thus helps to make the bird stand out more.
Second, note the dark shadow that extends a short distance left and
right of the bird. This is an artifact of the blur filter that
arises because of an imprecise selection when creating the background
layer. The problem is that some of the darker pixels from the
bird were inadvertently included in the background selection; the blur
filter smeared these darker pixels out around the bird, resulting in
the shadow.
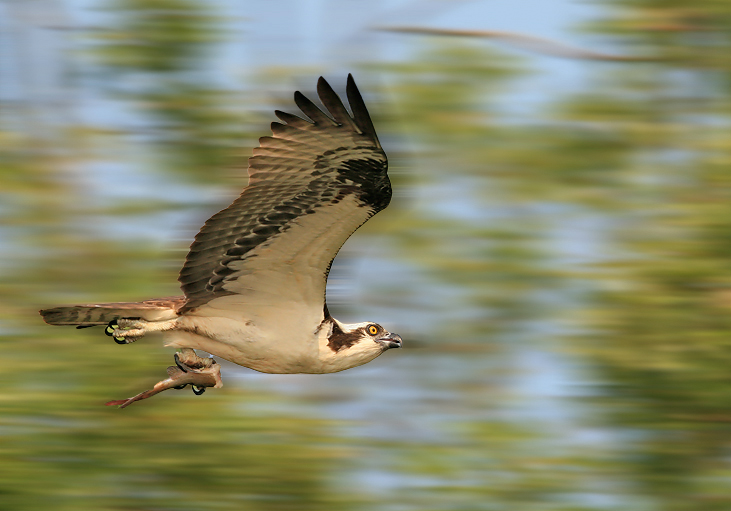
Fig.
13.4.4: The result of applying Motion Blur to the background.
Note the shadow apparent to the left and right of the bird. This
is
an artifact resulting from sloppy selection prior to creating the
background layer. Expanding or contracting the selection prior
to creating the layer can mitigate these effects, though if taken
too far you can induce other unpleasant artifacts (e.g., an
obvious margin around the bird that lacks any blurring).
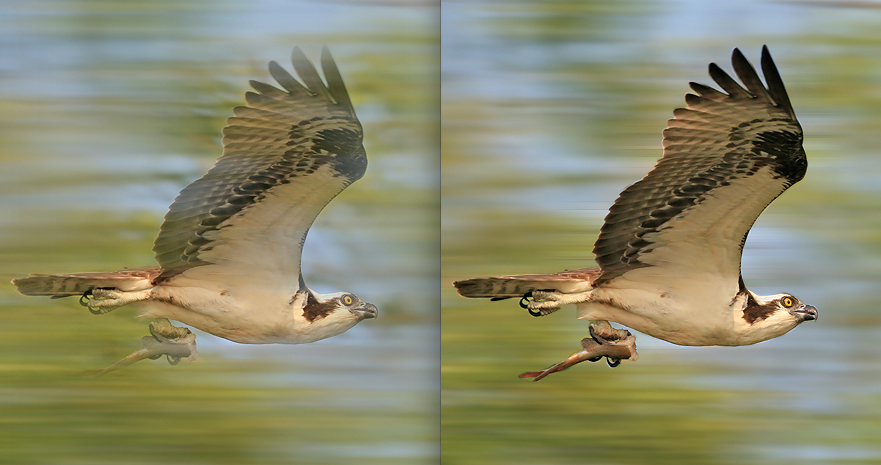
The leftmost image in the figure below illustrates a
more extreme case of this. Upon noticing this effect, the History
tool (section 10.5) was used to back up to an
earlier state of
processing, and then the foreground selection was expanded by 2 pixels
via Select > Modify > Expand.
The foregoing procedure was
then repeated: the selection was inverted, the background was
duplicated into a separate layer, transparent pixels were locked, and
the blur filter was applied. (The reason we expanded the
foreground selection rather than contracting the background selection
was to avoid edge artifacts around the outer margin of the image;
because of edge effects, expanding one selection is not always the
same as contracting its inverse selection). The rightmost image
in the figure below shows the result. The shadow effect has been
substantially reduced, due to the inclusion of fewer dark pixels from
the bird in the background selection. Further improvement could
be achieved using either a larger expansion radius or by manually
adjusting the selection boundary using the Quick Selection (or other) tool.
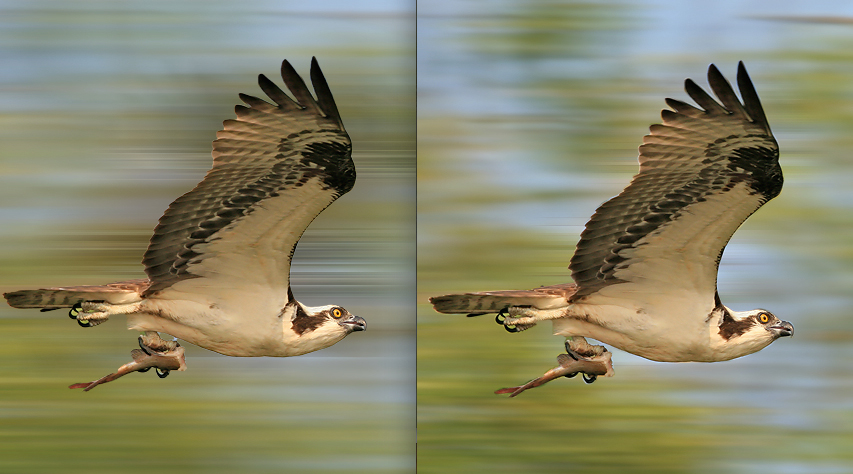 Fig.
13.4.5: Mitigating blur artifacts by adjusting the selection.
Left: dark pixels from the bird that were included in the background
selection resulted in dark smearing around the bird. Right:
expanding
the foreground selection prior to inverting it reduced the shadow effect
by allowing fewer stray pixels from the bird to fall within the
background
selection.
The next figure (below) illustrates the importance
of locking the transparent pixels before applying the blur
filter. The left image shows what happens when the transparent
pixels are not locked: the blurring has extended into parts of the
image occupied by the bird, resulting in loss of foreground detail, and
even the impression of a fog in front of the bird. There may
indeed be cases in which such an effect may be desirable in achieving a
particular artistic goal, so it’s often worthwhile to try multiple
settings of each parameter or button in a filter’s interface before
settling on a final setting.
Fig.
13.4.6: The importance of locking transparent pixels prior to blurring.
Left: blurring the background layer without first locking transparent
pixels
results in a haze over the bird. Right: locking the transparent
pixels ensures
that the output of the blur filter can’t intrude into the area occupied
by the bird.
As we’ve already remarked too many times in this
book, post-processing operations that dramatically alter reality in
this way will be found objectionable by some people; as long as you
don’t misrepresent your processed images by implying that they are
unaltered photographs, there is no reason why you should feel ashamed
to take advantage of digital tools to achieve an artistic rendering of
a bird and the scene it’s depicted in.
|
|
|