8.6 Being Flexible in the Field
There are a number of field
techniques that fall within the category of simply being maximally
flexible in the field; any of these might, on occasion, allow you to
get a quality shot that you’d otherwise miss. We’ll very briefly
enumerate some of these “tricks” in this section.
The first trick is to be prepared to detach your rig
from its tripod and use it hand-held. I have a number of shots
that I’ve captured this way, and that I probably couldn’t have captured
otherwise.
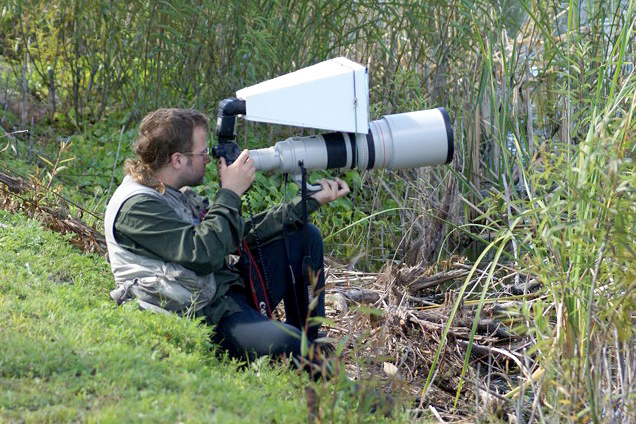
Fig. 8.6.1 :
Sometimes getting the right angle, quickly, requires taking the lens
off of the tripod
and taking the shot hand-held. When shooting a big rig hand-held,
you can use your body
and/or other objects (e.g., a tree or rock) as support. Notice in
the figure above that my left
forearm is supported by my leg. Whatever you do, just be careful
not to drop your rig
into an alligator-infested swamp! (Photo by Linda Huber; used
with permission).
In the field, birds sometimes appear seemingly out of nowhere, and when
they do so, your tripod-mounted rig is often not in the ideal position
to capture the bird. You can pick up the rig and move it, and/or
adjust the hight of the tripod via adjustments to the center column or
the leg angles, but often this takes too much time—especially on rough
terrain where there are no level surfaces. In the case of the
Canda warbler pictured below, following the bird with the
tripod-mounted rig simply proved too difficult due to the many tree
branches at different hights that would have required rapid tripod
adjustments as the bird foraged. Instead, I removed my 600mm f/4 lens from the tripod and used
it very briefly as a hand-held lens (with image stabilization
enabled). The image below is the only satisfying photo of this
bird that I was able to obtain, and it’s very likely I wouldn’t have
got it at all if I’d left the lens attached to the tripod.
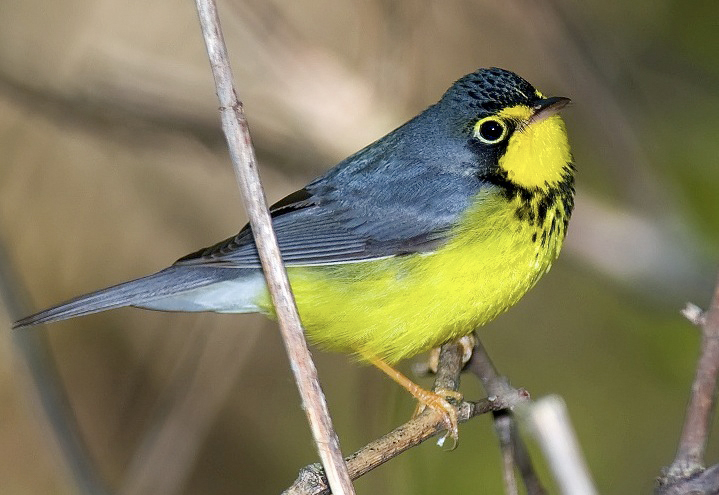
Fig. 8.6.2 : A
very lucky shot. I had been seeking Canada Warblers all week, so
when one suddenly
appeared out of nowhere just 20 feet from me, my adrenaline went into
overdrive. Because the bird
was behind a mass of branches, I had to quickly detach my camera/lens
from the tripod and find a
hole or “window” in the mass of
sticks and shoot the bird hand-held. Image stabilization (IS)
allowed
me to get a sharp image despite having to balance the huge camera rig
loosely in my hands.
A common reason for abandoning one’s tripod is the
appearance of a highly desirable bird directly overhead. Most
tripod heads can’t point straight up, and even for those that can,
raising the center column of the tripod for overhead shooting often
takes too much time when a subject is suddenly spotted flying
over. In the case of the swallow-tailed kite (Elanoides forficatus) depicted
below, I quickly abandoned my tripod when the bird appeared overhead,
and positioned my large 600mm lens vertically in what I call the two-handed grip of death—i.e., with
the $12000 rig (lens+camera) balanced precariously on my eyeball.
This was a “life bird” for me, and this shot was the
only (moderately good) one of this species that I was able to capture
on my two-week whirlwind tour through Florida.
Fig. 8.6.3 :
Another example of a shot I couldn’t have gotten without
detaching my lens from the tripod. The bird appeared directly
overhead
and was flying quickly. By the time I had the huge lens detached
from the
tripod and balanced precariously on my face, the bird was circling a
second time, and I was able to get this shot—the only decent kite photo
I took during my two-week trip to Florida.
Note that hand-held use of large lenses like this tends to be very
physically demanding, and may even result in personal injury and/or
serious damage to your equipment, so do
so at your own risk. I should also mention at this point
that just carrying a large lens around in the field may conceivably
result in injury due to repetitive stress on muscles, joints, or other
body parts. You’ve been warned.
For birds that remain at
reasonable, “tripod-accessible” heights, frequent lateral
movements of the subject can still require a bit of hustling on your
part to keep the subject at a good shooting distance. The
tricolored heron (Egretta tricolor)
shown below kept a group of about twelve photographers (including
myself) hustling back and forth for about a half hour as it continually
changed perches while hunting in a narrow canal in the
Everglades. Keeping pace with this bird required picking up my
entire tripod-mounted rig and literally running to the next location so as
to be ready for its next hunting foray. Sometimes strenuous
effort is called for in the field (being careful to avoid injury), and
in some cases that effort pays off. In this case I didn’t get any
exceptional photos of the bird, but I enjoyed the challenge anyway.
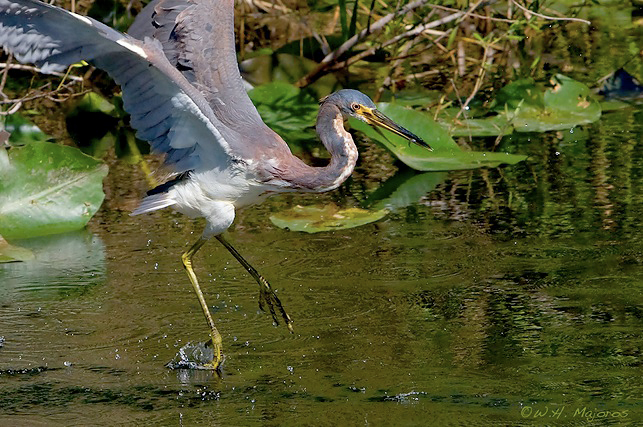
Fig. 8.6.4 :
Even when your lens stays mounted on the tripod, rapid movements of the
entire
tripod-mounted rig can prove critical when tracking an especially
active bird. This tricolored
heron kept a large group of photographers hustling for about half an
hour. Every time the
bird changed to a perch twenty feet away, we all picked up our heavy
rigs and rushed to
the new location. Bird photography is in some ways like belonging
to an outdoor fitness club.
As mentioned previously, an especially useful
strategy in the field is to be opportunistic—i.e.,
to be perpetually on the lookout for a good shot of any bird, even those you’re not
particularly interested in right at the moment. Though you may be
absolutely determined to capture a photo of an ivory-billed woodpecker,
getting a nice shot of a snail kite or a sandhill crane instead
probably doesn’t spell the end of the world. While on a stakeout
at a bald eagle nest, the red-headed woodpecker (Melanerpes erythrocephalus)
pictured below showed up just 30 or 40 feet from me. I already
had all my exposure parameters set for the eagles, and had found the
perfect focus (manually) via live
view, so I was hesitant to change settings for this
woodpecker. However, I was later glad that I did so, because it’s
the only decent red-headed woodpecker photo I have, whereas I now have
many photos of eagles. The moral of the story is: don’t turn up
your nose at a good bird just because the slightly better bird that you
were hoping to get hasn’t shown up as expected.
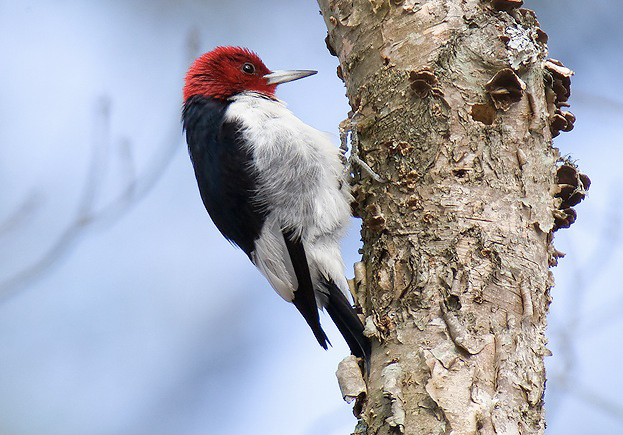
Fig. 8.6.5 :
Being opportunistic can really pay off in the long run. While on
a stake-out
at an eagle nest, this red-headed woodpecker suddenly appeared quite
close to me. Though
it required making some quick changes to focusing and exposure
parameters, I was glad
to get this image of a species I hadn’t yet had much luck
photographing. I certainly wasn’t
looking for red-headed woodpeckers that day.
Like many other nature photographers, when it rains
I usually stay home. But that’s not always a good idea.
When visiting an eagle hot-spot in Maryland I was told by a regular
visitor there that his best eagle shots tended to be taken on rainy
days, due to the reflection of flash light from the raindrops. My
own revelation about the utility of shooting on rainy days came when I
was on a two-week visit to a warbler hot-spot in Ohio. I drove
out to the site on a rainy morning, expecting to be the only
photographer there that day. I was amazed to see twenty or thirty
photographers lined up, each with an umbrella mounted over his or her
rig.
Shooting in the rain does involve some special
challenges. First, you need to protect your equipment. Pro
camera bodies typically have some weather sealing that will offer at
least some level of protection, but consumer-grade cameras generally do
not. Umbrella mounts can be purchased for use with some tripod
heads; for other heads you can simply attach your umbrella (preferably
an ultra-wide one) to your rig using duct tape or some other means (see
section 4.4). If the wind is blowing,
your gear can still get wet
under the umbrella; for passing storms you might get away with putting
a large trash bag over your rig until the storm has passed. I
always keep some ziplock bags and large trash bags in a vest pocket, in
case it rains; the ziplock bags are for memory cards, teleconverters,
or anything else that might get ruined in a downpour.
Note that even if your camera and lens are
weatherproof, your flash unit probably isn’t. Users of
high-voltage battery packs for flash units (such as the Quantum)
sometimes experience minor electrical shocks in rainy conditions.
Other miscellaneous problems encountered on rainy days are fogged
viewfinders, fogged eyeglasses, and fogged (or wet) objective glass
elements on one’s main lens. Soggy ground can also be a problem
for tripods. Note that some of these problems apply also to snow,
sleet, and/or freezing rain. When shooting images that contain
visible precipitation of any kind, be sure to use second-curtain sync for your flash
(unless you’re already using high-speed sync), to avoid giving the
raindrops or snowflakes the appearance of moving upward rather than
downward (see section 7.2).
Even on clear days it’s possible to get wet.
When shooting waterbirds from shore you’ll often find yourself
accidentally stepping into the water. While this usually only
results in soggy socks, just be aware that there’s the potential for
equipment damage if you happen to lose your balance and fall into the
water (or if you get splashed by a passing jet-ski).
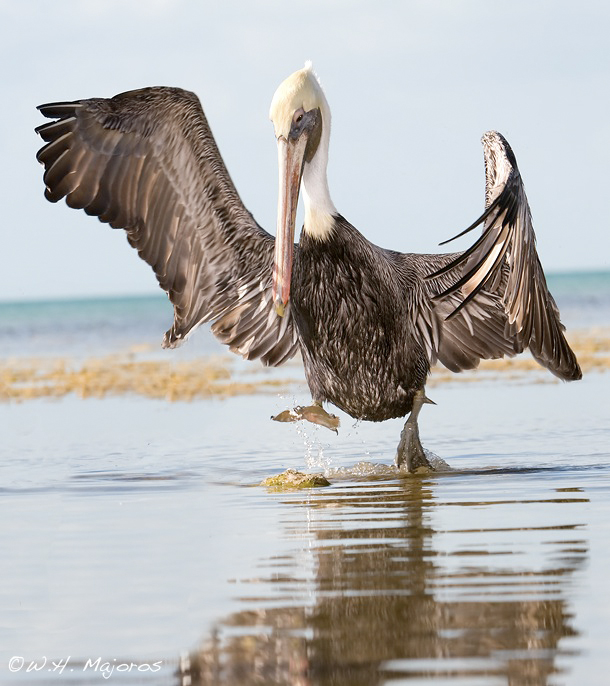
Fig. 8.6.6 : To
get this shot I had to kneel in shallow water, resulting in some
discomfort since I wasn’t wearing chest waders. Bird photography
can quite
literally help you to keep “in touch” with nature.
When
seeking low angles in water, it often does help for you to be willing
to get a little wet (or to invest in a pair of chest-waders).
Kneeling or stooping in shallow water may earn
you both a good photograph and a wet pair of underwear. You need
to
decide what’s most important to you.
|