|
5.6 Image
Processing Software
While instruction in the use of
image processing software is deferred to Part III of this book, here we
will very
briefly consider some of the issues involved in selecting such a
software package, including a survey of the important features offered
by various packages, as well as some advice regarding compatibility
issues.
The most popular option (among those who can afford
it) is obviously Adobe’s well-known Photoshop
program, which has a
well-deserved reputation for being extremely powerful, though also
somewhat difficult to learn how to use. Of the competing
commercial products comparable to Photoshop, the most prominent is
probably
Corel’s Paint Shop Pro, or PSP. While PSP does appear to
offer
most or perhaps even all of the essential features used by casual
Photoshop users, and at a seemingly far reduced price (under $100 US
for PSP, versus many hundreds of dollars for Photoshop), PSP is
currently available only for use on Windows
machines (i.e., on PC’s, but not
Macs). Furthermore, while the full version of Photoshop is indeed
extremely expensive, the “lite” version, called Photoshop Elements, is nearly the
same price as PSP, and is available for both Windows and
Mac systems. Also, students and others affiliated with
educational institutions can get the full version of Photoshop at a
fraction of the price that the general public pays. I paid about
$200 for my copy a few years ago, instead of the full $600, since I
work at a university. Though I previously used Photoshop
Elements, I did find that the additional features included in the full
version (called Photoshop CS3,
which has now been upgraded to CS4)
did occasionally come in handy.
Regarding the use of competing products, keep in
mind that as the industry standard, Photoshop is much better
documented, via internet-based tutorials and the like, than competing
programs such as PSP. There are untold numbers of Photoshop
tutorials available for free on the internet, showing in detail how to
achieve the most amazing visual effects. There are also many
add-on products from third-party software companies (so-called “Photoshop Plug-ins”) that seamlessly integrate with
Photoshop and
extend its functionality in various ways (such as more intelligent
noise-removal algorithms). Many free plug-ins are available as
well.
For those readers with recently-purchased Canon or
Nikon DLSR’s, there is another, far more economically palatable option
than either Photoshop or its various commercial
competitors—namely, the free software that came bundled with your
camera. In the case of Nikon cameras, this would be View NX,
while the Canon product is called DPP
(for Digital Photo Professional).
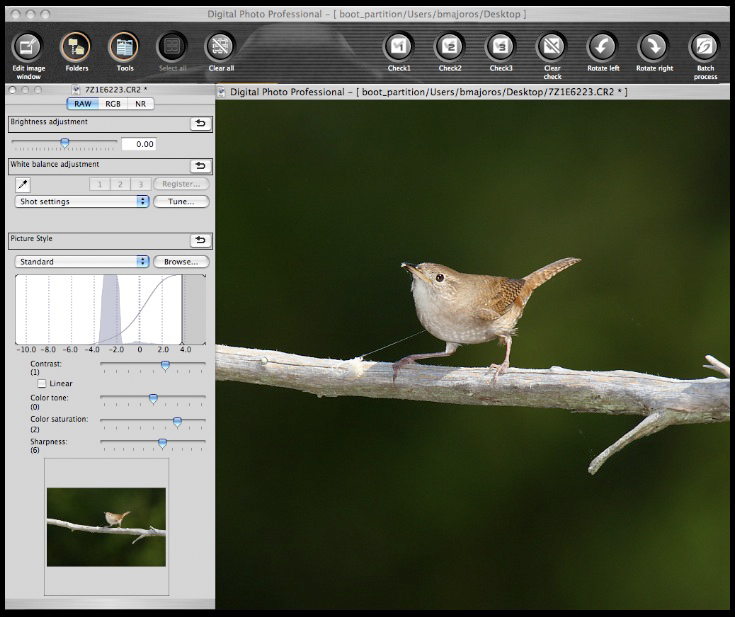
Fig. 5.6.1: An
OEM photo processing program: Canon’s “DPP” (Digital Photo
Professional).
Nikon has a comparable product called Capture/NX2. Although far
less powerful than
Photoshop, these programs let you adjust the sharpness, saturation,
contrast, brightness,
and color balance of your photos. They don’t allow complex
editing, such as erasing
a stray branch, or separating the foreground from the background.
These free programs from camera manufacturers are
obviously not meant
to compete with the likes of Photoshop and other commercial products,
but for many casual bird photographers, they are probably quite
adequate. In fact, there is one aspect of these OEM (original equipment manufacturer)
products
which can potentially outperform all competing products, and that is
the OEM software’s RAW-conversion
engine. Though we’ve not yet
discussed RAW files, they’re
the files with the most image information
(as compared to inferior file formats such as JPG) that are exported by
your camera onto the memory card, and must be read in by whatever
image-processing software you opt to use. Since each camera
manufacturer uses their own proprietary RAW file format (e.g., CR2 for
Canon, NEF for Nikon),
software companies without an explicit business
relationship with the camera manufacturer have to reverse-engineer that
company’s RAW file format in order to be able to work with it in their
software. Since the OEM will generally have a more perfect
understanding of its own file format, the RAW conversion engine
produced by that OEM can be exepected (usually—though not always) to produce the
highest-quality conversions (i.e., from RAW to JPG or other target file
format) of their RAW files.
If you spend any significant amount
of time lurking in online photography tech forums like dpreview.com or fredmiranda.com,
you’ll see that the true zealots will always insist
that systematic comparisons between competing cameras’ images be
done via their RAW files and using only the appropriate RAW
converters. A poor RAW converter may result in image artifacts
such as moire patterns, and potentially
other issues affecting image quality, so this is a factor worth
considering
when shopping for image processing software. It is, of course,
possible to use any arbitrary RAW converter to convert your files to a
common format such as TIFF or JPG, and then to import these converted
files into whichever editing software you elect to use, though it’s
much more convenient when your editing software can do the RAW
conversion itself, since this simplifies your workflow. Photoshop
in particular is very convenient in this regard, and though not
everyone agrees that Photoshop’s RAW converter is the best, I’ve found
it to work exceptionally well for my photos.
Yet another option—and I personally did this for
several years—is to simply use the built-in or bundled software that
came packaged with your computer’s operating system. In the case
of Mac systems, there is a program included in all current
distributions called “Preview”, which is intended largely as a
utility
for viewing images as well as other types of documents (e.g.,
PDF files). This program also includes a very limited set of
image
manipulation functions, including adjustment of brightness, saturation,
contrast, and sharpness, as well as a primitive but surprisingly
effective method for performing color correction (e.g., fixing images
in which parts that should be white actually look yellow).
Unfortunately, it doesn’t include any noise reduction functionality.
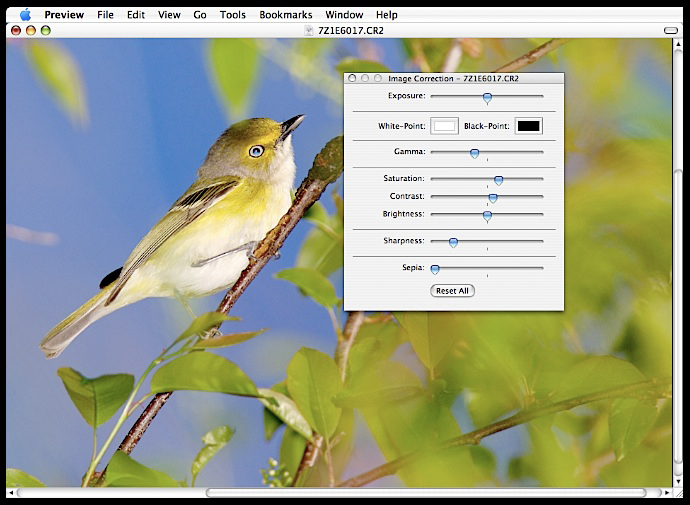
Fig. 5.6.2: The
“Preview” program that
comes standard with Apple’s “OS X” operating
system;
a comparable utility is available for Microsoft’s “Windows” operating
system. These programs
alllow basic but rapid adjustment of image properties, such as
brightness, sharpness, contrast,
saturation, and color balance.
One very large advantage of programs like Preview (and whatever happens
to be its current counterpart in the Windows
world) is the speed with
which you can use it to process very large numbers of images. By
double-clicking a file with the mouse, I can bring up Preview on my
Mac, and then with a few quick adjustments to sliders on the Image
Correction panel, I can typically get a photo very close to its
optimal
settings for publication on the internet (i.e., as low-resolution
images on web pages).
For those who take lots and lots of bird photos but have very limited
time for adjusting the images prior to posting them on the internet,
simple solutions like Preview can be ideal (especially when they’re
also free).
What simple programs like Preview can’t do is to
permit detailed manipulation of specific parts of an image, and this
type of manipulation turns out to be desirable in more cases than you
might imagine. A simple but highly representative example is the
selective removal of noise from parts of an image. As described
previously, noise is typically much more noticeable in smooth
background regions than in the foreground (i.e., in the bird).
Although most commercial software packages provide for noise removal,
they typically also result in a reduction of detail in the subject,
which is especially noticeable for highly detailed subjects like
birds. Thus, a very common workflow for processing bird images is
to
first separate the bird and its background into different layers, and
then to apply the noise-removal filter to only the background layer of
the image, so that the parts of the image with noticeable noise are
cleaned up while the subject retains all of its original detail.
These types of manipulations tend to be either impossible or extremely
laborious in many software packages, whereas in Photoshop they can be
extremely easy, due to Photoshop’s advanced tools for separating
foreground subjects from their background.
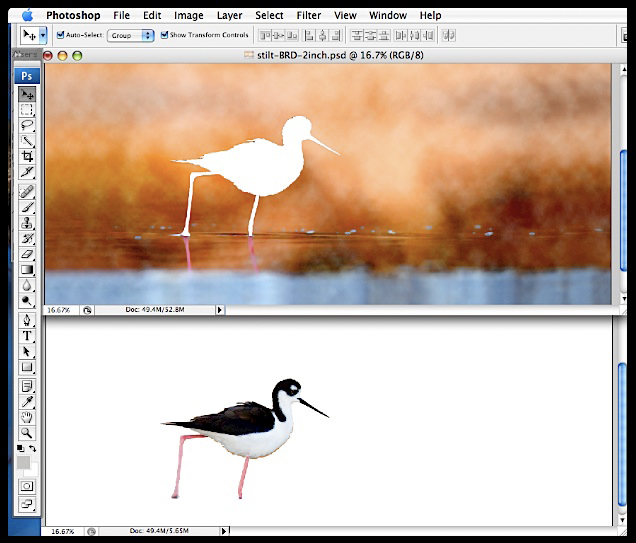
Fig. 5.6.3: Separating the foreground from the background in Photoshop.
Differential processing of the bird and its environment is one of the
most powerful
techniques in bird photography postprocessing. Just the ability
to selectively reduce
noise in parts of an image arguably justifies the high price tag of
Photoshop, since
it arguably offsets much of the value offered by more expensive cameras
boasting
lower noise output.
In Part III of this book we’ll show in great detail how
to perform many image processing tasks in Photoshop.
|
|
|